
CHANGELOG
Here's our little big updates
See what's new added, changed, fixed, improved or updated in RevenueHero.


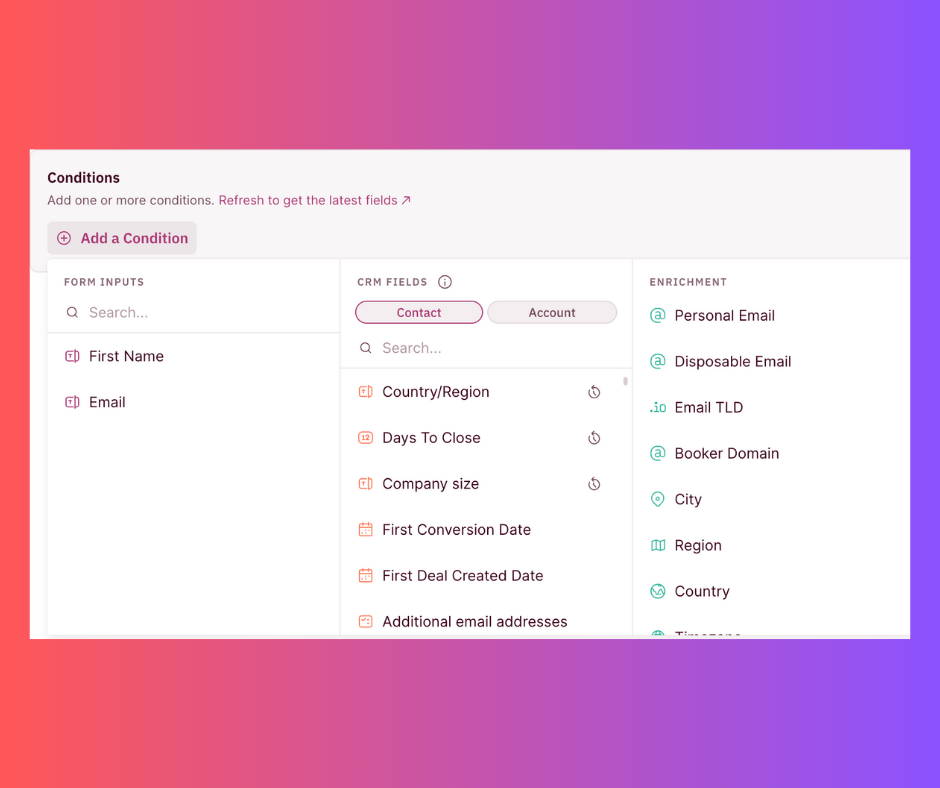
We are excited to share that RevenueHero offers native enrichment support through which it can enrich and detect 4 new fields without having to set up hidden fields in the web form.
It works out of the box without the need for any additional products. You can route meetings to the right team based on region without any extra developer effort.
The 4 fields that we support out of the box are:
- Personal email: whether the prospect used a free inbox or not
- Disposable email: whether the prospect’s email came from a list of temporary emails
- Country: what country did they visit from
- Timezone: what timezone did the prospect operate in
These enriched fields can be added as conditions in the distribution rules to help you qualify leads instantly.
Easily map the RevenueHero enriched fields to your CRM fields to ensure all the data gets synced in real-time. Furthermore, you can find all the leads that have been qualified based on the enrichment rule in your Routing Log.


It’s a new quarter and our dev team is going full steam ahead to bring you some amazing feature updates.
This week the focus has been on upgrading existing capabilities and improving the overall experience of RevenueHero. Let’s find out what’s gotten a sprucing over.
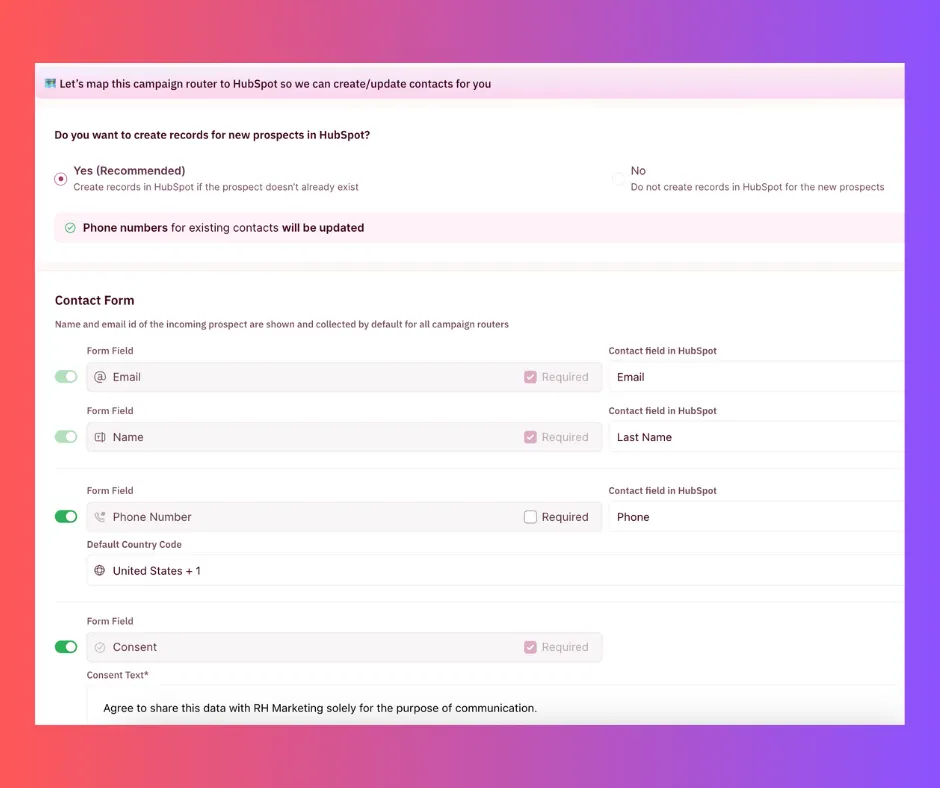
Contact Form for Campaign Routers
When creating/editing a Campaign Router, an additional step has been added to allow admins to customize what data needs to be collected in the contact form. This has been specifically introduced for situations where you require additional data from your prospects such as phone number or consent to process the meeting booked.
There are 4 fields in the Contact Form -
- Email (Mandatory)
- Name (Mandatory)
- Phone Number
- Consent
You can use the toggle button to choose if you want to add/remove the phone number and consent fields. Based on your company guidelines, you can also customize the text that is displayed in the consent field.
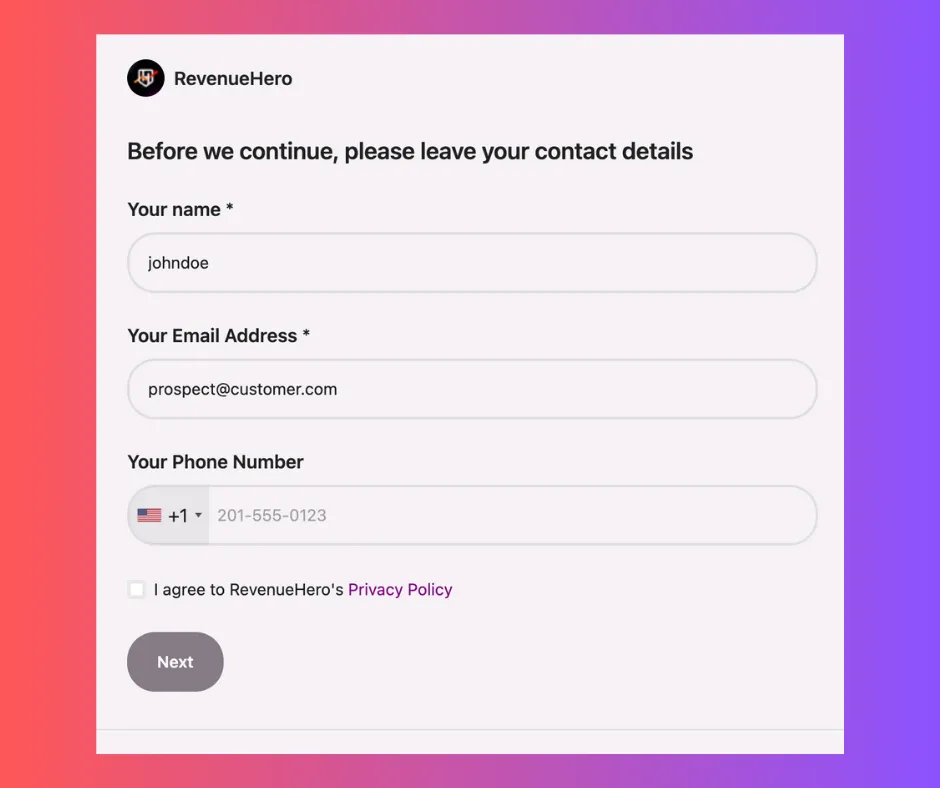
This is how the Contact Form will look to the customer.
Automated Form Mapping
Next up, we have introduced the capability to automatically identify fields to be mapped within RevenueHero for any customer’s website.
Here’s how you can set it up:
- When creating a Campaign Router, the first step gives you the option to map a form via the URL of the webpage that hosts the form.
- Once you enter the URL, RevenueHero does a quick check to detect the form. If detected, it shows you a screenshot of the said form.
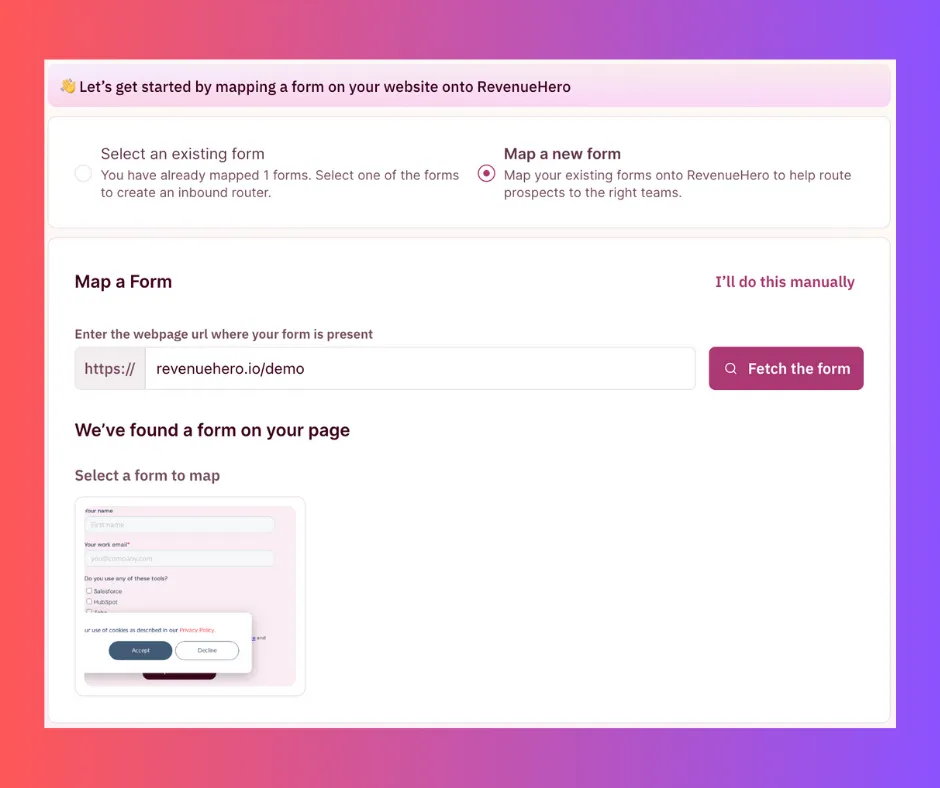
- Select and confirm the form.
- The form ID gets automatically mapped.
- You’ll have to map individual form fields to your CRM field based on the values extracted from your webpage. And you’re good to go.
-In cases where RevenueHero can’t identify the form, you’ll be asked to map it manually
If you need further assistance with this, reach out to us via Slack.
Chrome Extension Support for Outreach, SalesLoft, and Outlook
It’s been over a month since we rolled out the RevenueHero Chrome Extension. And our engineering team has been pulling out all the stops to make the Chrome Extension available within more tools you love and use - Outreach, SalesLoft, and Outlook.
-
In Outreach, you can now see a “Book a meeting” button inside the platform using which you can schedule a time with your prospect right away.
-
In addition to the “Book a meeting” button inside SalesLoft, you also have the option to use the rh/ command shortcut which is integrated with the SalesLoft text editor to book a meeting with your prospect.
- For Outlook Web, here are all the capabilities that our Chrome Extension offers:
- Option to click and view the meetings’ primary guest account details in the CRM from your Outlook Calendar.
- Mark no-shows and Reassign meetings directly from the Outlook Calendar invite.
- Easy navigation to view complete meeting details inside RevenueHero.
- Check if a prospect exists in the CRM when creating a new event in Outlook Calendar, using the email address.
We hope these updates make your daily experience using RevenueHero a lot more frictionless and efficient.
If you need any assistance with any of these, feel free to reach out via Slack and we’ll help you set it up.

It’s been a minute!
But we’re back here with some massive updates, which are in fact capabilities that have been highly requested and sought after by prospects in a scheduling solution like ours. And it’s finally here!
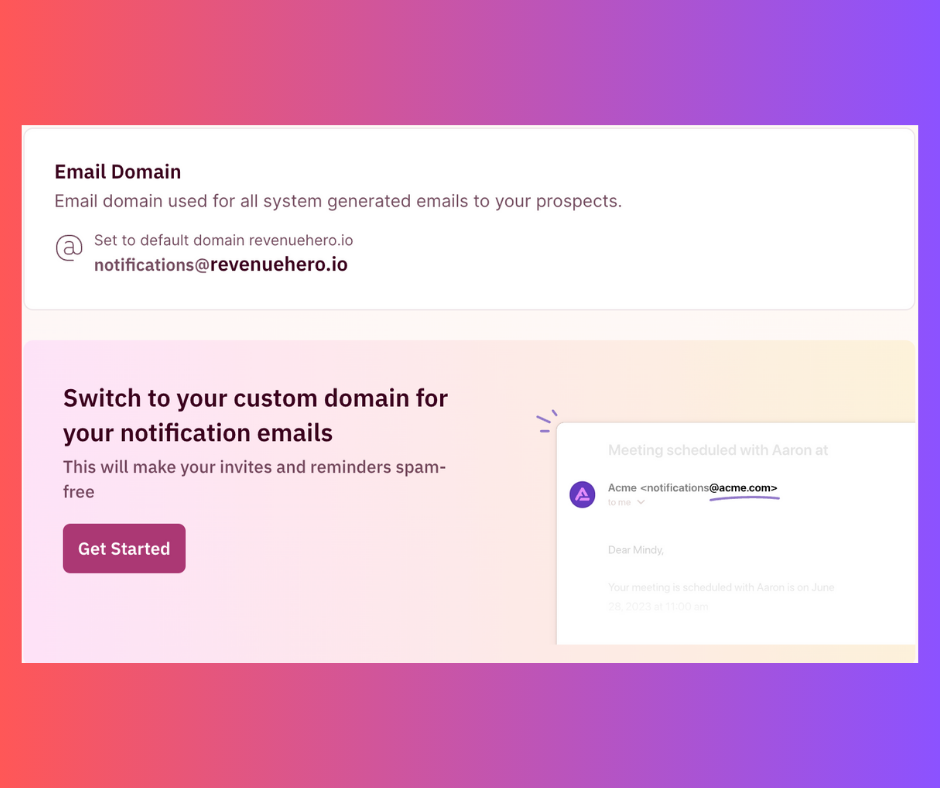
DKIM (Email Configuration)
With DomainKeys Identified Mail (DKIM) you can customize the email domain used for all system generated emails to your prospects. This lets you add an additional layer of personalization, ensure spam-free communication for your prospects, and helps you stay on-brand at every touchpoint.
Yes, that includes email notifications for meeting invites, reminders, and more.
How to set it up
It’s a fairly simple and straightforward process.
- Head over to the Email Configuration tab under Settings.
- Click on “Get Started” and enter the custom domain you would like to use.
- You’ll be required to verify the domain.
- Upon verification, all your emails sent out via RevenueHero will have the custom domain.
Okta SSO
You can now set up a custom RevenueHero integration in Okta for Single Sign-On. This is another step forward in our commitment to our customer’s data security and privacy.
The Okta integration will enable secure access and authentication for customers while logging into our platform.
When it comes to setup, we’ll do most of the heavy lifting but we do require some initial setup to be done at your end to enable it. You can find the steps to get started here.
If you need any help during this process, reach out to us via the Slack channel and we’ll jump right in and get it sorted.

If you, like the author of this release note, have multiple tabs open on your browser to remember all the things you need to get done, you also know the hassle of shuffling through the tiny tabs till you find the one you’re looking for.
Especially if it is a time-critical task, like say booking a meeting with your AE and prospect while reading an email confirmation.
We are delighted to announce the launch of our Chrome Extension that lets you book meetings instantly from anywhere, anytime, and for the right sales rep.
Let’s break down the details of this huge release.
-
RevenueHero’s Chrome Extension is designed to allow SDRs/BDRs to book meetings wherever they are. This includes your sales engagement tools like Outreach, SalesLoft, Apollo, your CRM, your mailbox, or any screen on your browser.
-
With this extension, SDRs will be able to add and send instant meeting availability slots in your emails. Customers get a 1-click booking experience as they can choose the slot that works for them right from their mailbox.
-
Reps can also use it to add inline meeting slots to email responses without having to navigate between multiple tabs.
-
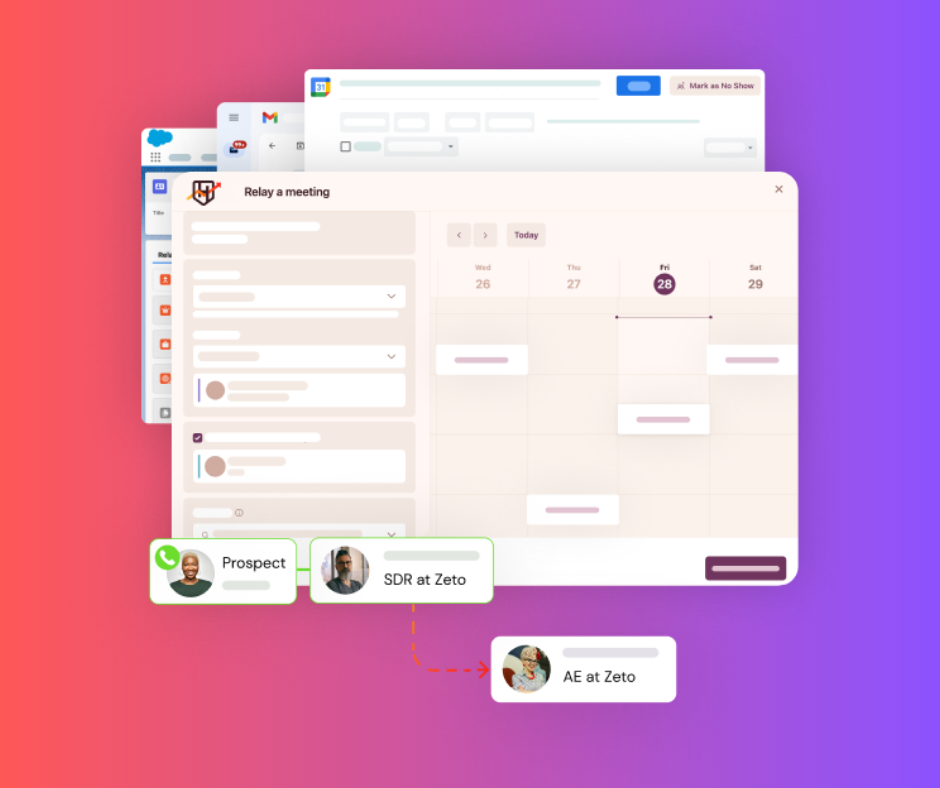
SDRs can use the Chrome extension to handoff meetings to the right AEs instantly. Relay meeting links can be created and accessed from wherever they are - CRM, inbox, Outreach, and SalesLoft. RevenueHero looks up the right AE and lets them book the meeting instantly, sends out the invites, and updates all the meeting details in the CRM automatically.
-
With the extension, reps can view and manage all their meetings as well as their time zone and availabilities from wherever they are in the browser.
-
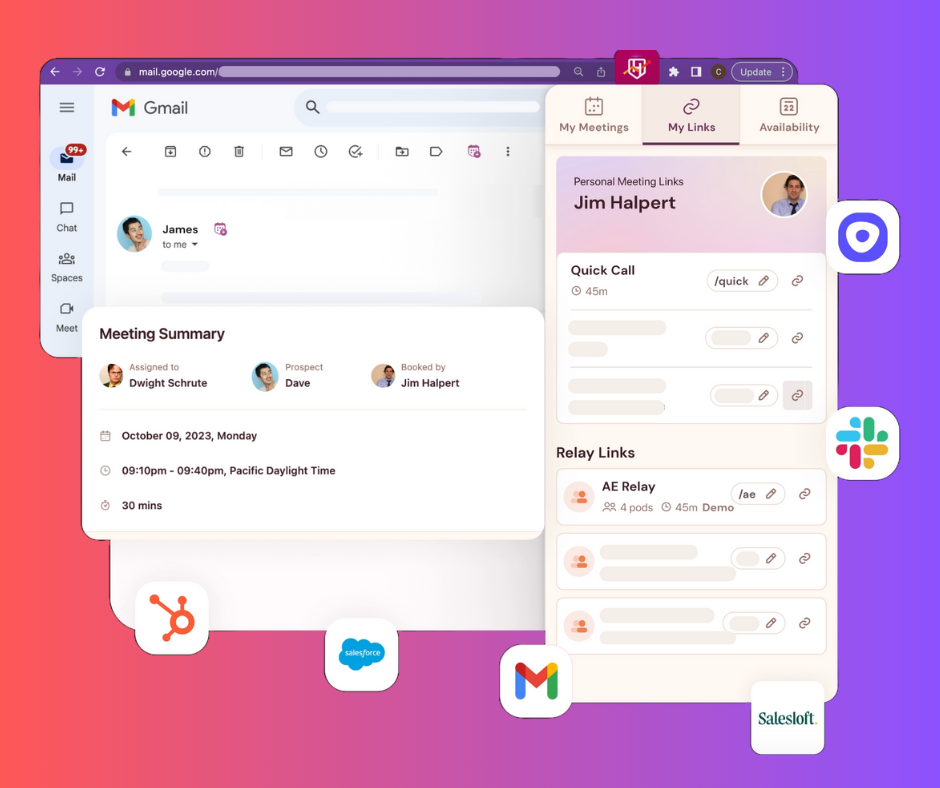
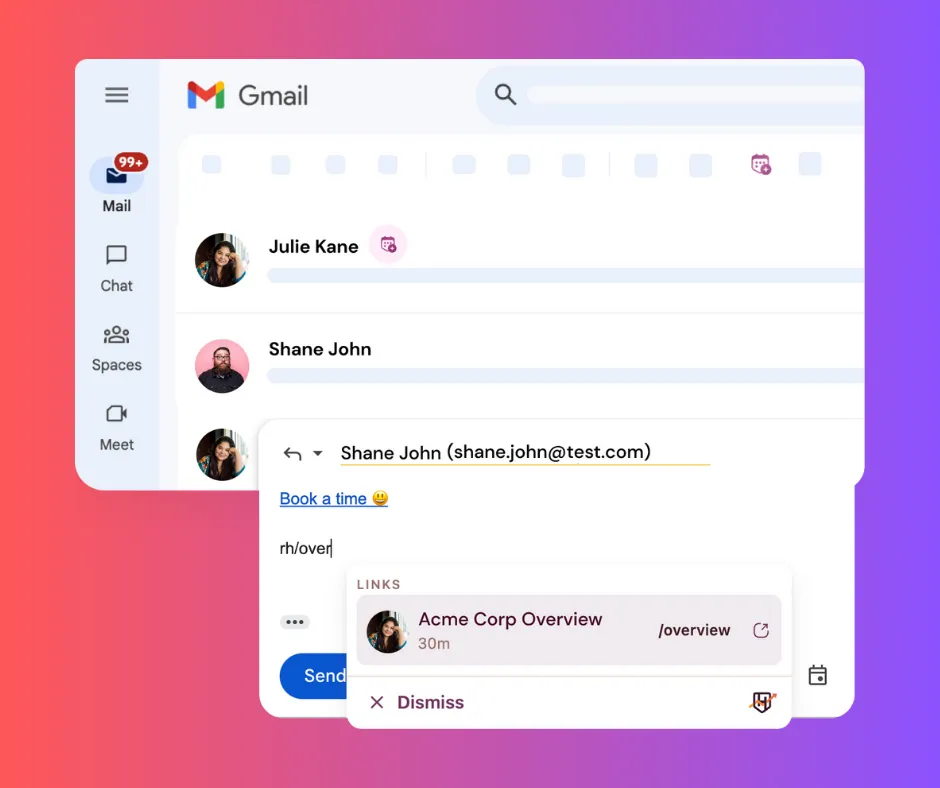
Another great aspect of the extension is that it creates shortcuts for all the meeting links (be it personal meeting links, Relay meeting links, or Campaign links). These shortcuts can be used by SDRs and AEs inside Gmail, HubSpot, and LinkedIn to quickly share specific meeting links.
Our Chrome Extension’s capabilities have been designed to cover a wide range of activities and tasks inside Google Calendar and Gmail.
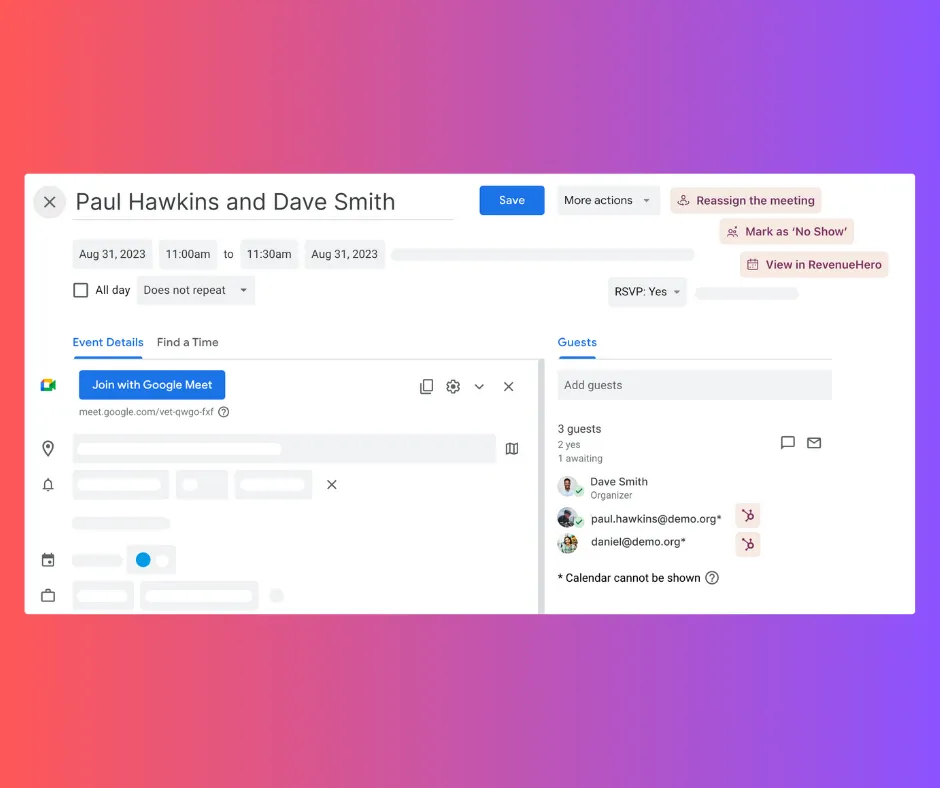
- Option to click and view the meetings’s primary guest account details in the CRM from Google Calendar.
- Mark no-shows and Reassign meetings directly from the Google Calendar invite.
- Easy navigation to view complete meeting details inside RevenueHero.
- Check if a prospect exists in the CRM when creating a new event in Google Calendar, using the email address.
-
In Gmail, each email thread and compose email window has a “Book a meeting” icon next to the sender’s name that allows you to insert meeting slots instantly.
-
An alternative to this is to use the meeting shortcuts by directly typing rh/ which will open a command menu to automatically insert the meeting link.
How to set this up
- Download the RevenueHero extension to book meetings from the Chrome web store.
- Once installed, you will see a small RevenueHero icon on the Chrome extension bar, near the bookmarks.
- Click on the RevenueHero icon and sign in to your account.
- Once you’re logged in, you’re all set to start managing and booking meetings from wherever you are in the browser.
If you need further assistance reach out via Slack and we’ll help you set it up.


Earlier this week we rolled out a massive feature for all our customers to make the #SDRtoAEHandoff as efficient and effortless as it can be - Relays.
Our customers have been using and loving it. They also keep us on our feet and it drives us to do more and do better. Our newly launched Relays just got better with this update.
Fallback Pods
As any distribution logic goes, you will always have exceptions. And with relays, we just launched a mandatory fallback pod to make sure that the dependency to create a fallback for that one sneaky CRM record that doesn’t match is no longer on the admin.
What this essentially means is that you’ll have to create a Distribution Pod without any conditions so that in the event the existing Pods with conditions don’t match the meeting will still get assigned to a rep from the Fallback Pod.
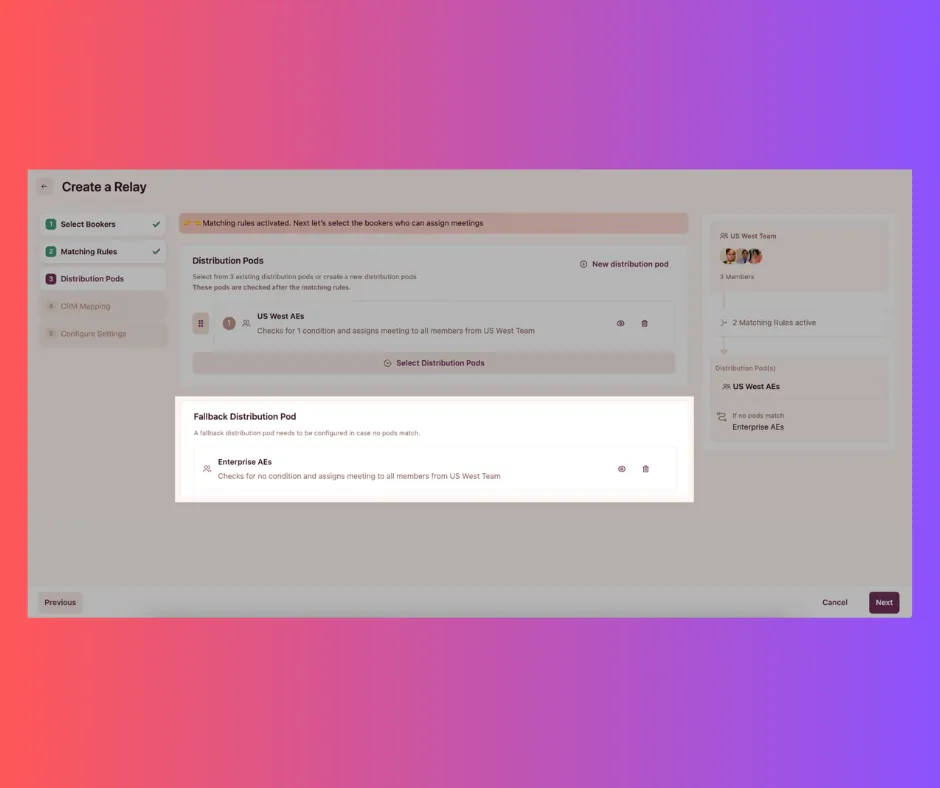
This is a mandatory step when you are setting up Relays. Find the detailed guide here.
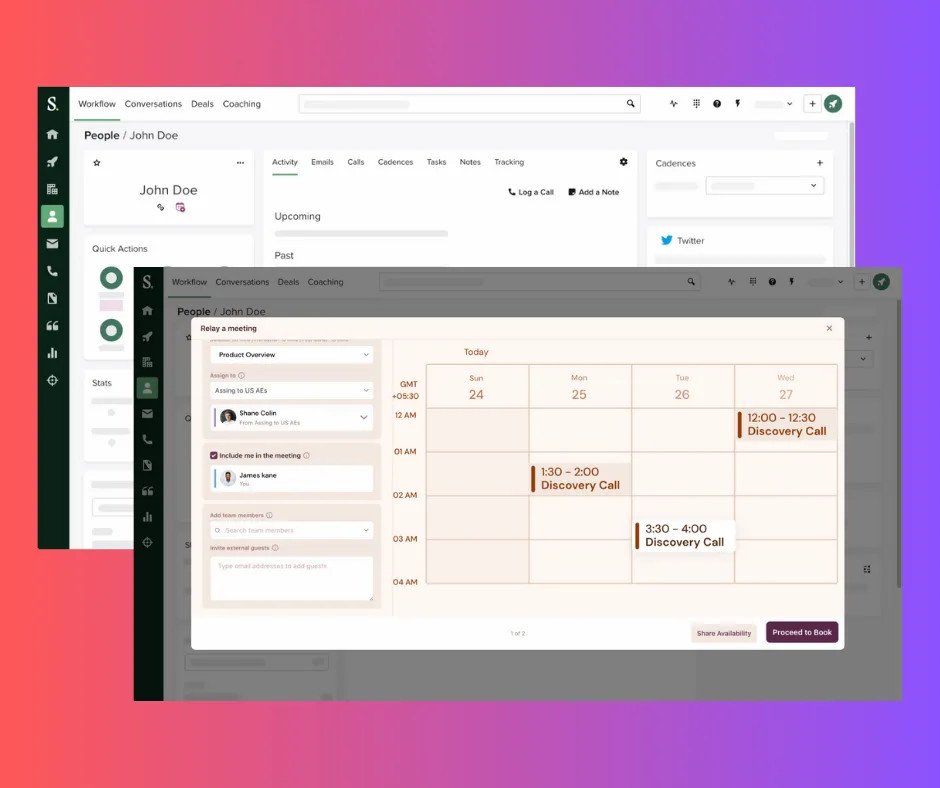
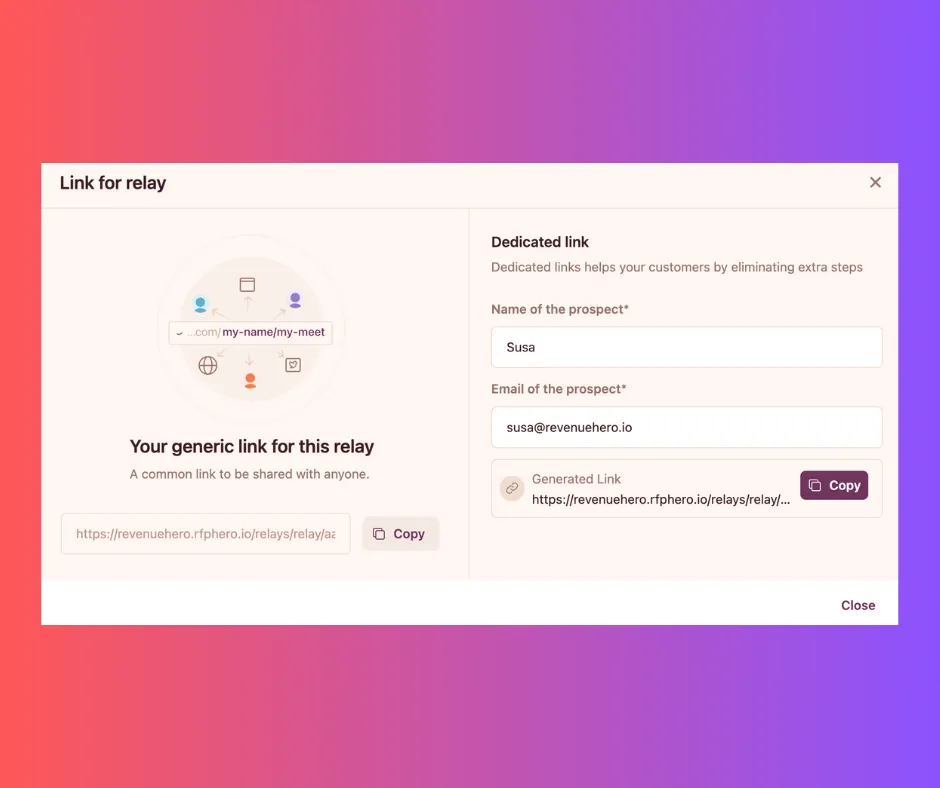
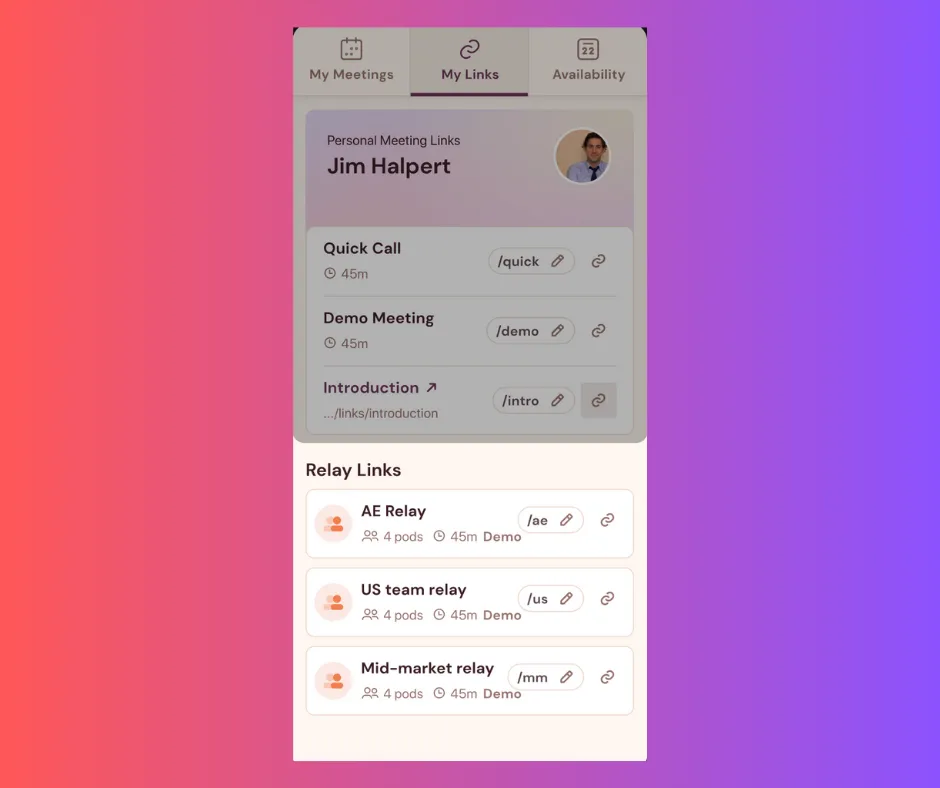
Relay Links
With this new feature, you can easily access and share your Relay meeting links from wherever you are on your browser using the Chrome extension.
This lets you share a meeting booking link directly with your prospect and assign it to the right AE based on the conditions and distribution rules set up. Every time you create a new Relay meeting this link gets automatically generated.
- All you have to do is, click on the RevenueHero Chrome Extension icon.
- Click on the My Links tab in the pop-up.
- Under the Relay Meeting Links, select the link you want to share.
- It automatically gets copied to your clipboard.
- You can now paste it to your email, message, or any other communication channel you want to.
Alternatively, you can also copy this Relay meeting link from RevenueHero after you create the Relay.
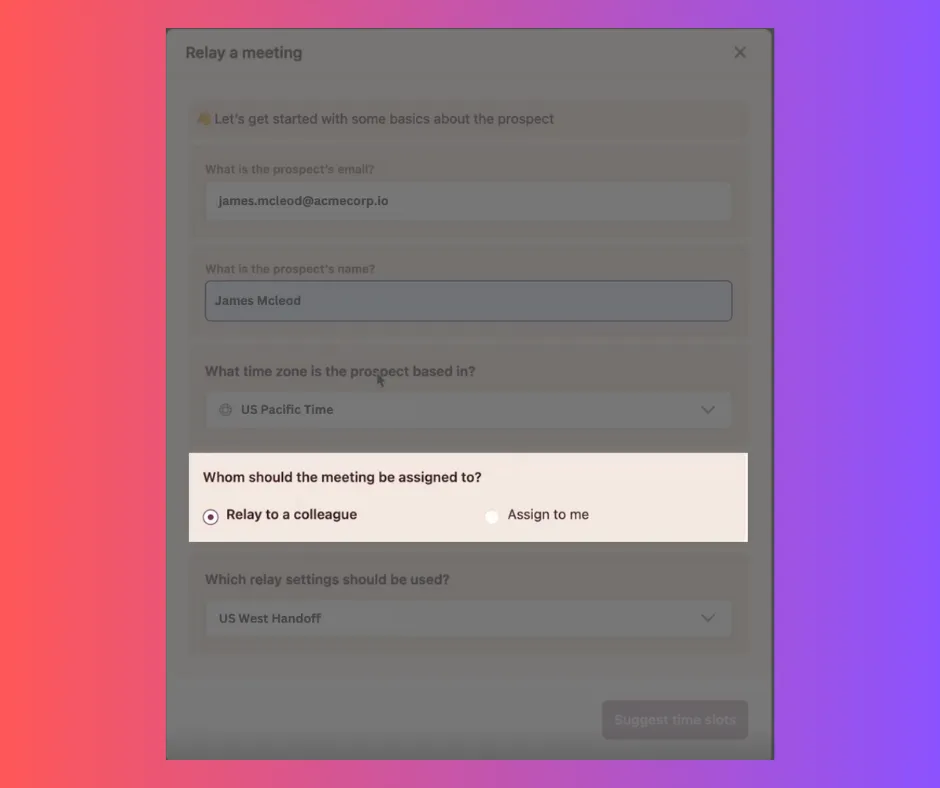
Relays - Book for yourself
Your reps can now book meetings for themselves after talking to a customer/prospect using Relays. The Relay setup helps identify what CRM fields need to be mapped for updating meeting details in real-time.
If you need any help with any of these Relays functionalities, feel free to reach out via Slack and we’ll walk you through it.